
Welcome to the Honeywell Installation Manual, your comprehensive guide for installing and configuring Honeywell devices. This manual ensures proper setup, safety, and optimal performance for your system, covering essential steps and troubleshooting tips to guarantee efficiency and reliability.
1.1 Overview of Honeywell Products
Honeywell offers a wide range of innovative products designed for home comfort, security, and energy efficiency. From programmable thermostats like the T5 and T9 models to advanced smart home systems, Honeywell provides solutions tailored to modern living. These devices are known for their user-friendly interfaces, customizable settings, and seamless integration with smart home platforms. Honeywell products emphasize energy-saving features, such as auto-home/away modes and geofencing technology, ensuring optimal performance while reducing energy consumption; Whether you’re installing a thermostat, security system, or air quality monitor, Honeywell’s commitment to quality and innovation ensures reliable operation and enhanced convenience for homeowners.
1.2 Importance of Proper Installation
Proper installation of Honeywell products is crucial for ensuring safety, optimal performance, and energy efficiency. Incorrect installation can lead to system malfunctions, increased energy consumption, and potential safety hazards. Following the manual’s guidelines guarantees that your device operates as intended, maximizing comfort and efficiency. Additionally, proper installation ensures compliance with manufacturer warranties, protecting your investment. It also minimizes the risk of errors or damage during operation. By adhering to the installation instructions, you can enjoy reliable functionality, reduce energy costs, and extend the lifespan of your Honeywell product. This step is essential for achieving the full benefits of your system and maintaining peace of mind.

Pre-Installation Requirements
Ensure system compatibility, gather necessary tools, and follow safety guidelines before starting the installation. Verify all components and materials are available to avoid delays and ensure smooth setup.
2.1 System Compatibility Check
Before installation, verify that your Honeywell device is compatible with your existing system. Check voltage requirements, wiring configurations, and software versions to ensure seamless integration. Refer to the product specifications in the manual or on the Honeywell website. Incompatibility can lead to malfunctions or reduced performance. Ensure your system meets all technical requirements for optimal functionality. This step is crucial to avoid potential issues during and after installation. Proper compatibility ensures efficient operation and extends the lifespan of your Honeywell device.
2.2 Tools and Materials Needed
To ensure a smooth installation, gather the necessary tools and materials beforehand. You will need a screwdriver set, wire strippers, and a voltage tester to handle electrical connections safely. A drill and wall anchors may be required for mounting the device. Additionally, ensure you have the correct wiring and connectors specified in the manual. A ladder or step stool might be necessary for high installations. Consult the Honeywell manual for any specific tools or materials recommended for your particular device. Having all items ready will prevent delays and ensure proper setup.
2.3 Safety Precautions
Before starting the installation, ensure all safety precautions are followed to avoid accidents. Turn off the power supply to the system at the circuit breaker to prevent electrical shocks. Wear protective gear, such as gloves and safety glasses, when handling tools or wiring. Follow the manufacturer’s guidelines for handling electrical components and ensure proper ventilation in the workspace. Never override safety features or bypass alarms, as this can lead to system malfunctions or hazards. Keep the installation area clear of debris and ensure it is well-lit. For high installations, use a sturdy ladder or step stool and maintain three points of contact. Always refer to local electrical codes and regulations for compliance.

Installation Process
The installation process involves disconnecting power, wiring components correctly, mounting the device securely, and powering up the system. Follow guidelines carefully for smooth setup.
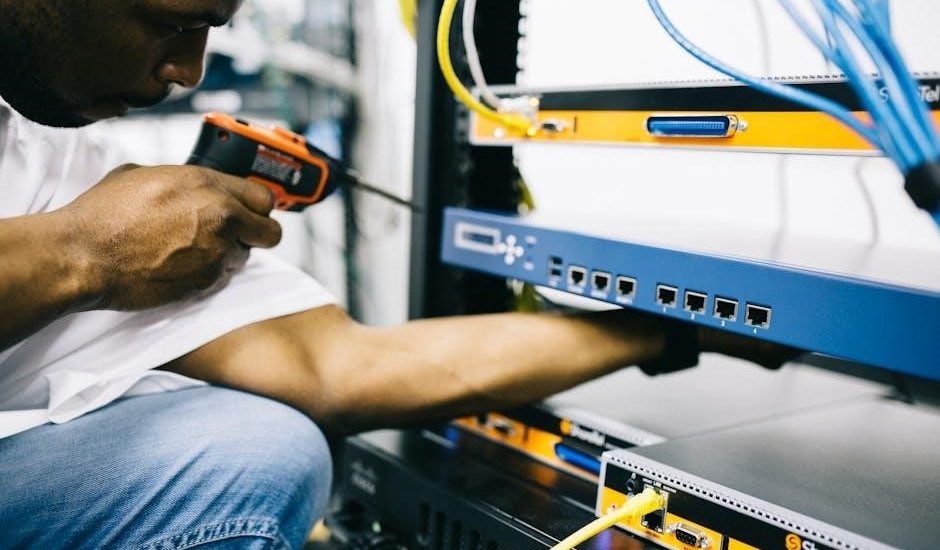
3.1 Wiring and Connections
Proper wiring is crucial for safe and effective installation. Begin by disconnecting the power supply to avoid electrical hazards. Carefully match each wire to its corresponding terminal, ensuring color codes align with the manual’s instructions. For Honeywell thermostats, typically, green is connected to the fan, blue to cooling, white to heating, and red to power. Double-check all connections to prevent short circuits or malfunctions. If unsure, consult the wiring diagram provided in the manual. Once all wires are securely connected, proceed to mount the device and power it on. Always follow manufacturer guidelines to ensure compliance and safety.
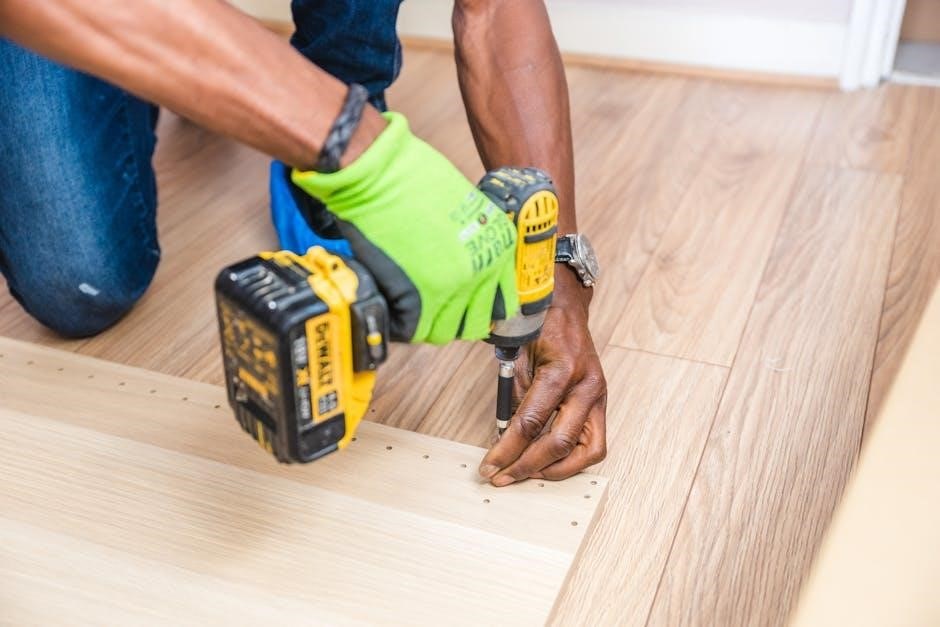
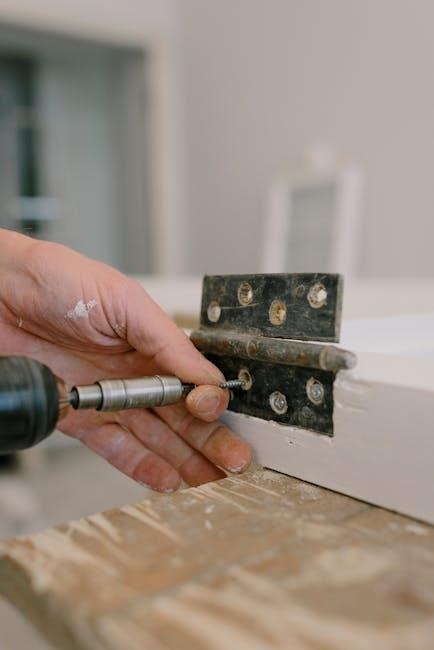
3.2 Mounting the Device
Mounting your Honeywell device securely is essential for its proper function and longevity. Begin by identifying a suitable location, ensuring it is level and accessible. Use the provided mounting bracket to attach the device to the wall, screwing it firmly into place. Avoid over-tightening to prevent damage. Once the bracket is secured, carefully place the device onto it, ensuring all clips or screws align properly. Check that the device is level and tighten any necessary fasteners. For thermostats, ensure the unit is not exposed to direct sunlight or extreme temperatures. Finally, verify that all wires are neatly secured to the mounting bracket to prevent damage or interference. Proper mounting ensures reliable performance and longevity of your Honeywell system.
3.3 Powering On the System
After completing the installation and wiring, carefully power on your Honeywell system. Ensure the power source matches the device’s specifications to avoid damage. Turn on the circuit breaker or plug in the device, then check for any indicators like LED lights or sounds that signal successful startup. If a thermostat, wait for the screen to display and confirm all settings are visible. Test basic functions, such as temperature adjustments or system mode changes, to ensure proper operation. If issues arise, refer to the troubleshooting section or consult a professional. Proper power-up ensures your Honeywell system operates efficiently and safely from the start.

Configuration and Programming
Configure your Honeywell system by navigating the menu interface to set schedules, preferences, and smart features. Program settings to optimize performance and ensure seamless connectivity for enhanced functionality.
4.1 Navigating the Menu Interface
Navigating the Honeywell menu interface is straightforward. Use the touchscreen or buttons to access various settings. Tap or click on menu options to view submenus, adjust preferences, and configure features. The interface is designed to be user-friendly, with clear labels and intuitive navigation. Regularly explore the menu to familiarize yourself with all available functions. If you encounter issues, refer to the manual or online support for guidance. Proper navigation ensures optimal system configuration and performance, making it essential to master the menu interface for a seamless experience. This section provides detailed steps to help you navigate efficiently.
4.2 Setting Up Schedules and Preferences
Setting up schedules and preferences on your Honeywell system allows for personalized comfort and energy efficiency. Create custom schedules by navigating to the “Schedules” section in the menu, where you can set temperature adjustments for different times of the day; Preferences such as humidity levels, fan settings, and temperature ranges can also be customized to suit your needs. Ensure your preferences align with your lifestyle for optimal performance. Regularly review and adjust schedules to adapt to seasonal changes or new routines. This feature ensures your system operates efficiently, providing consistent comfort while minimizing energy usage. Proper setup of schedules and preferences is key to maximizing your Honeywell system’s potential.
4.3 Connecting to Wi-Fi and Smart Features
Connect your Honeywell system to Wi-Fi to enable smart features and remote control. Start by selecting the “Wi-Fi” option in the menu and choosing your network from the list. Enter your network password to complete the connection. Once connected, download and install the Honeywell Home app to access advanced features. Use the app to adjust settings, receive notifications, and monitor energy usage. Ensure your router is functioning properly for a stable connection. If issues arise, restart your router or check network settings. A strong Wi-Fi connection is essential for seamless smart functionality and integration with other smart home devices.
Troubleshooting Common Issues
This section covers common issues like error messages, connectivity problems, and system malfunctions. Follow troubleshooting steps to resolve these issues efficiently, ensuring optimal system performance.
5.1 Error Codes and Their Meanings
Understanding error codes is crucial for diagnosing and resolving issues with your Honeywell system. Error codes like E1, E2, or E3 indicate specific problems, such as temperature sensor malfunctions or communication failures. Refer to the manual for a detailed list of codes and their meanings. For example, E1 often signifies a temperature differential issue, while E2 may point to a wiring problem. Familiarize yourself with these codes to identify the root cause quickly. Use the troubleshooting guide to address each issue systematically. Always ensure proper installation and connectivity to minimize errors and maintain system efficiency. This section helps you decode and resolve errors effectively.
5.2 Resolving Connectivity Problems
Connectivity issues can disrupt your Honeywell system’s performance. Start by ensuring your device is connected to the correct Wi-Fi network and the password is entered accurately. Restart your router and thermostat to refresh the connection. Check for firmware updates, as outdated software can cause communication errors. Verify that the system’s MAC address is registered on your network. If issues persist, reset the thermostat to factory settings and reconfigure it. Consult the error code list for specific guidance. Ensure all cables are securely connected and avoid physical obstructions between devices. For advanced troubleshooting, refer to the Honeywell app or contact customer support for assistance.
5.3 Resetting the System
Resetting your Honeywell system can resolve persistent issues. Start by powering off the device and waiting 30 seconds before restarting it. For thermostats, remove the battery or press and hold the reset button (if available). Perform a factory reset via the menu by selecting “Reset” or “Factory Settings.” This will restore default configurations, so you’ll need to reconfigure preferences. Ensure the reset process is completed as per the manual to avoid partial resets. If issues persist after resetting, consult the troubleshooting section or contact Honeywell support for further assistance. Regular resets can help maintain system stability and performance.
Advanced Features and Customization
Explore advanced features like voice control, smart home integration, and energy-saving modes. Customize settings to optimize comfort, efficiency, and system performance tailored to your preferences and lifestyle.
6.1 Using Voice Commands
Enhance your experience with Honeywell devices by utilizing voice commands through compatible smart speakers like Amazon Alexa or Google Assistant. This feature allows seamless control of your thermostat, enabling you to adjust temperatures, schedules, and settings hands-free. Simply link your Honeywell system to your preferred voice assistant and enjoy the convenience of managing your home comfort with just your voice. Voice commands are ideal for multitasking, offering a modern and efficient way to maintain your desired indoor climate without needing to physically interact with the device. This integration ensures a smarter, more connected living experience tailored to your lifestyle and preferences.
6.2 Integrating with Smart Home Systems
Honeywell devices seamlessly integrate with popular smart home systems like Samsung SmartThings, Apple HomeKit, and IFTTT, enhancing your home automation experience. This integration allows you to control your thermostat, security cameras, and lighting systems from a single platform. By connecting your Honeywell system to these platforms, you can create custom scenes, automate routines, and enjoy enhanced convenience. For example, you can set your thermostat to adjust temperatures when you leave home or arrive back. Compatibility with voice assistants and smart hubs ensures a unified and efficient smart home ecosystem, making it easier to manage your comfort, energy usage, and security effortlessly.
6.3 Energy-Saving Settings
Honeywell systems offer advanced energy-saving features to optimize your home’s energy consumption. Use geofencing to automatically adjust temperatures when you leave or arrive home. The smart recovery feature learns your schedule to pre-heat or cool your home efficiently. Program energy-saving schedules to reduce usage during off-peak hours or when spaces are unoccupied. The energy-saving mode adjusts settings to minimize energy use while maintaining comfort. Additionally, you can set temperature limits to prevent excessive heating or cooling. These features work together to lower your energy bills and reduce your environmental impact, ensuring your home remains comfortable while being eco-friendly. Regular updates and customization options further enhance energy efficiency.
Maintenance and Upkeep
Regular maintenance ensures Honeywell devices operate efficiently. Clean filters, update firmware, and perform system checks to maintain performance and extend lifespan. Schedule routine inspections for optimal functionality.
7.1 Cleaning the Device
Regular cleaning of your Honeywell device ensures optimal performance and longevity. Turn off the power before cleaning to avoid damage. Use a soft, dry cloth to wipe down surfaces, removing dust and debris. For stubborn stains, lightly dampen the cloth with water, but avoid harsh chemicals or excessive moisture. Never spray liquids directly onto the device. Clean the touchscreen gently to prevent scratches. Check vents and grilles for blockages and remove any obstructions. Schedule cleaning every 1-3 months, depending on usage. Proper maintenance helps maintain energy efficiency and ensures accurate system operation.
7.2 Updating Firmware
Keeping your Honeywell device’s firmware up-to-date ensures optimal performance, security, and access to the latest features. To update the firmware, navigate to the device’s menu and select the “Settings” or “System” option. Check for available updates and follow the on-screen instructions to download and install the latest version. Some models may require a USB connection, while others can update wirelessly via Wi-Fi. Always ensure the device is powered on and connected to a stable network during the update process. Regular firmware updates improve functionality, fix bugs, and enhance overall system efficiency. Refer to the user manual for specific instructions tailored to your Honeywell model.
7.3 Regular System Checks
Performing regular system checks ensures your Honeywell device operates efficiently and reliably. Start by visually inspecting wiring and connections for damage or wear. Test sensors and switches to confirm they respond accurately. Check the system’s power supply and ensure all components are properly aligned. Review settings and schedules to verify they align with your preferences. Additionally, inspect air filters and clean them as needed to maintain optimal performance. Use the device’s diagnostic tools to identify potential issues early. Finally, review the system logs to monitor usage patterns and address any recurring problems promptly. Regular checks help prevent malfunctions and extend the lifespan of your Honeywell system.
Completion of the Honeywell installation ensures your system is fully functional and ready for use. Verify all components are correctly configured and operating smoothly for optimal performance and reliability.
8.1 Best Practices for Ongoing Use
Following best practices ensures your Honeywell system operates efficiently and effectively. Regularly update firmware to access new features and security patches. Maintain a clean device to prevent dust buildup, which can affect performance. Schedule periodic checks to ensure all components are functioning correctly. Use energy-saving settings to optimize your system’s performance and reduce utility bills. Additionally, utilize the menu interface to monitor and adjust preferences as needed. By adhering to these practices, you can extend the lifespan of your system and ensure it continues to meet your needs reliably. Proper maintenance and smart usage will maximize your Honeywell device’s potential.
8.2 Manufacturer Support and Resources
Honeywell provides comprehensive support and resources to ensure a seamless experience with your installation. Visit the official Honeywell website for detailed manuals, troubleshooting guides, and FAQs. Customer service is available to address technical inquiries and provide assistance. Additionally, Honeywell offers online communities and forums where users can share experiences and solutions. Regular firmware updates are accessible through the manufacturer’s portal, ensuring your system stays up-to-date. For further guidance, refer to the included documentation or contact Honeywell’s dedicated support team. These resources are designed to help you troubleshoot, maintain, and optimize your system for peak performance and reliability.
8.3 Final System Verification
After completing the installation and configuration, perform a thorough verification of your Honeywell system. Ensure all components are functioning correctly, and the system operates as intended. Check for proper connectivity, response to commands, and adherence to programmed settings. Verify that features like scheduling, remote access, and smart integrations work seamlessly. Test all safety and energy-saving modes to confirm they activate and perform as expected. Review error logs to identify and address any issues. Once verified, your system is ready for reliable, long-term use, providing comfort, efficiency, and peace of mind. This final check ensures optimal performance and user satisfaction.