
The Alesis Nitro Mesh Kit is a high-quality 8-piece electronic drum set designed for drummers of all skill levels, featuring advanced mesh head technology for realistic feel and sound.
Overview of the Alesis Nitro Mesh Kit
The Alesis Nitro Mesh Kit is a professional-grade electronic drum set designed for drummers seeking high-quality sound and performance. It features a complete 8-piece configuration, including a drum module, mesh-head pads, and cymbals. The kit is centered around next-generation Alesis Mesh head technology, providing an ultra-quiet and responsive playing experience. With its versatile design, the Nitro Mesh Kit is ideal for both beginners and advanced drummers. It offers a wide range of customizable drum kits and sounds, allowing for personalized setups. The kit also includes durable hardware and a user-friendly interface, making it a reliable choice for practice, recording, or live performances. Its modular design ensures easy assembly and adjustment to suit individual preferences.
Key Features and Benefits
The Alesis Nitro Mesh Kit offers an 8-piece electronic drum configuration with responsive mesh-head pads for a natural playing experience. It includes a professional drum module with a wide range of customizable drum kits and sounds, catering to diverse musical styles. The kit features durable hardware, including a sturdy frame and adjustable legs, ensuring stability during performances. Its ultra-quiet mesh heads make it ideal for home practice, while the module’s user-friendly interface allows for easy sound customization. Additional benefits include MIDI connectivity for expanded functionality and compatibility with external devices. The kit is lightweight and portable, making it suitable for both home use and live performances. Its versatility and professional-grade features make it an excellent choice for drummers of all skill levels, from beginners to seasoned musicians.
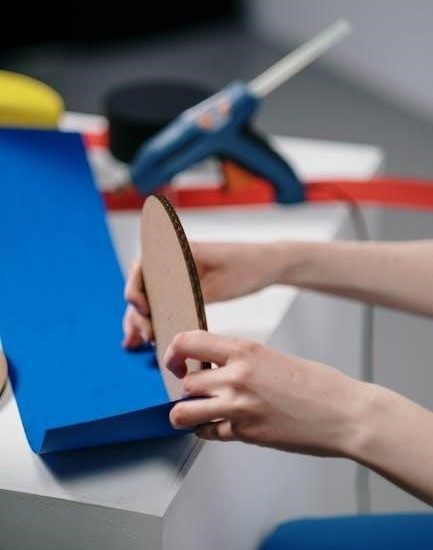
Unboxing and Inventory
The Alesis Nitro Mesh Kit arrives with all necessary components, including the drum module, pads, cymbals, pedals, and hardware, plus an assembly guide for setup.
What’s Included in the Box
The Alesis Nitro Mesh Kit includes a drum module, 8″ mesh snare pad, three 8″ mesh tom pads, and a 10″ mesh bass drum pad. It also features a 10″ crash cymbal and a 10″ ride cymbal, both with choke functionality. The kit comes with a hi-hat pedal, bass drum pedal, and all necessary hardware, such as clamps, mounts, and a sturdy chrome-plated steel rack. Additional components include a drum key for adjustments and a detailed assembly guide. The package also contains a power supply for the module and a cable snake to connect all pads and cymbals seamlessly. This comprehensive setup ensures everything needed to start playing is included right out of the box.
Checking for Damages or Missing Parts
Before assembling the Alesis Nitro Mesh Kit, carefully inspect all components for damage or defects. Verify the inclusion of the drum module, mesh pads (snare, toms, and bass drum), cymbals, pedals, and hardware. Ensure the cable snake, drum key, and assembly guide are present. Check the rack, clamps, and mounts for integrity. Examine the mesh heads for tears or unevenness. If any items are missing or damaged, contact Alesis support immediately. Refer to the assembly guide for a complete list of included parts. This step ensures a smooth and hassle-free setup process.
Assembly Process
The Alesis Nitro Mesh Kit assembly involves attaching the frame legs, connecting drum pads, cymbals, and pedals, and installing the drum module. Follow the guide step-by-step to ensure proper setup and functionality.
Step-by-Step Guide to Assembling the Kit
Begin by carefully unboxing and inventorying all components to ensure no parts are missing or damaged. Start with the main frame, attaching the legs using the provided screws and a drum key for tightening. Next, connect the drum pads and cymbals to their respective mounts, ensuring secure fastening. Attach the pedals to the frame, aligning them properly for optimal playability. Install the drum module by mounting it to the frame and connecting it to the cable snake. Finally, connect all pads, cymbals, and pedals to the module using the provided cables. Power on the module, test each component for functionality, and adjust settings as needed for a seamless playing experience.
Attaching the Legs to the Main Frame
To securely attach the legs to the main frame, begin by placing the frame on a flat surface. Identify the leg assemblies and align them with the corresponding mounting points on the frame. Use the provided bolts and a drum key to tighten the connections firmly. Ensure the legs are evenly spaced and the frame is stable. Tighten each bolt in a star pattern to maintain balance and prevent warping. Double-check that all connections are secure before proceeding to avoid any instability during use. Properly attached legs are essential for maintaining the kit’s balance and ensuring a smooth playing experience. Follow the manual’s specific torque recommendations for optimal results.
Connecting the Drum Pads and Cymbals
Begin by connecting the drum pads and cymbals to the main module using the provided cables. Ensure each pad is securely attached to its corresponding port on the module. The snare, toms, and bass drum pads connect to their designated inputs, while the cymbals (crash and ride) connect to their respective ports. Use the cable snake to organize and simplify the connections. Tighten all cables firmly to prevent loose connections during play. Once connected, power on the module and test each pad and cymbal to ensure proper responsiveness. If any pad or cymbal fails to trigger, check the connections for proper alignment and tighten as needed. Properly connected pads and cymbals are crucial for optimal performance and accuracy.
Setting Up the Pedals
Position the pedals according to your playing preference, ensuring they are stable and evenly spaced. Connect the bass drum pedal to the designated input on the module, typically labeled “Kick.” For the hi-hat pedal, attach it to the “Hi-Hat” port. Use the provided screws or clamps to secure the pedals to the drum frame if necessary. Adjust the pedal tension using the drum key for optimal response and comfort. Once connected, test the pedals by striking the pads gently to ensure proper triggering and dynamics. If the pedals feel too tight or loose, fine-tune the tension until you achieve your desired feel. Proper pedal setup ensures precise control over your drumming performance.
Installing the Drum Module
Mount the drum module securely to a stand or table, ensuring it is stable and at a comfortable height. Connect the cable snake to the module’s designated input ports, ensuring each drum pad and cymbal is correctly matched to its corresponding jack. Power on the module and use the navigation buttons to select your preferred drum kit. Adjust any settings as needed to customize your sound. Use the drum key to tighten any loose connections for optimal performance. Once installed, test each pad and cymbal to ensure proper triggering and adjust sensitivity settings if necessary. Proper installation ensures seamless integration with your drum pads and cymbals, providing optimal performance and sound quality.
Connecting the Cable Snake
Locate the cable snake and identify its multiple connectors and single plug. Plug the single end into the drum module’s input. Match each connector to the corresponding drum pad or cymbal using the manual’s diagram. Connect the snare, toms, and cymbals to their labeled ports. Ensure all connections are secure. Test each pad and cymbal to confirm they trigger sounds correctly. If any issues arise, verify connections against the diagram or adjust module sensitivity settings. Proper connection ensures all components communicate effectively with the module, providing accurate sound triggering and optimal performance.
Setting Up the Drum Module
Power on the module and navigate through menus using the dial and buttons. Assign sounds to pads via input settings and adjust sensitivity for optimal response. Connect MIDI for external devices.
Navigating the Module’s Interface
The Alesis Nitro Mesh Kit module features an intuitive interface with a clear LCD display and navigation controls. Use the dial to scroll through menus and press buttons to select options. The home screen displays kit selection, while deeper menus allow adjusting pad sensitivity, MIDI settings, and system preferences. Press the Utility button to access advanced settings like metronome, tempo, and time signature. Save your configurations using the Save function to maintain your customizations. The module also supports kit editing, letting you assign sounds to pads and fine-tune response; Familiarize yourself with the menu structure to unlock the full potential of your Nitro Mesh Kit.
Configuring Basic Settings
To configure basic settings on the Alesis Nitro Mesh Kit module, start by powering on the unit and navigating to the main menu using the LCD display. Select the Kit option to choose from pre-loaded drum kits or create a custom one. Adjust the Volume level to suit your playing environment. Enable the Metronome for practice and set the tempo using the dial or arrow buttons. Configure the Time Signature to match your music. Save your settings by pressing the Save button to ensure your preferences are retained. These basic configurations will help you tailor the module to your drumming style and enhance both practice and performance.
Assigning Drum Kits and Sounds
The Alesis Nitro Mesh Kit module allows you to assign drum kits and sounds to customize your playing experience. Start by selecting a pre-loaded drum kit from the module’s library, which offers a variety of sounds to suit different genres. To assign sounds to specific pads, navigate to the Pad menu, then choose the desired sound for each pad or cymbal. You can also create custom kits by mixing and matching sounds from the module’s internal library. Save your custom kit using the Save Kit option to retain your configuration. This feature ensures versatility, enabling you to tailor your drum kit to match your musical style or adapt to new sounds as you experiment with different techniques.
Calibrating the Mesh Heads
Calibrate the mesh heads for optimal sensitivity and response, ensuring accurate performance. Adjust settings using the module to achieve the perfect balance for your playing style.
Adjusting Sensitivity and Response
Adjusting the sensitivity and response of the mesh heads ensures optimal performance. Access the drum module’s settings menu and select the sensitivity adjustment option. Use the provided drum key to fine-tune the mesh head tension for the desired feel. Higher sensitivity settings make the pads more responsive to lighter strokes, while lower settings suit heavier hitters. Experiment with these adjustments to achieve the perfect balance for your playing style.
After adjusting, test the pads with various dynamics to ensure consistent response. Save your settings in the module to maintain your custom configuration. Proper calibration enhances accuracy and overall playing experience.
Calibrating the Snare and Tom Pads
Calibrating the snare and tom pads ensures accurate triggering and response. Start by accessing the drum module’s calibration menu. Select the snare or tom pad you wish to adjust and follow the on-screen prompts to enter calibration mode. Lightly strike the pad with a drumstick to set the threshold. Repeat this process for all tom pads, ensuring each is calibrated to your playing style. Adjust the sensitivity settings if needed to optimize performance; After calibration, test the pads with dynamic strokes to confirm consistent response. Proper calibration ensures precise sound triggering and enhances your overall drumming experience.
Setting Up Cymbal Response
Setting up cymbal response on the Alesis Nitro Mesh Kit ensures natural and dynamic interaction. Begin by accessing the drum module’s settings menu and selecting the cymbal type for each pad. Adjust the sensitivity to match your playing style, ensuring accurate triggering. Strike the cymbal with a drumstick to set the threshold, then fine-tune the response curve for natural feel. For crash cymbals, enable the “choke” function to mimic real cymbal behavior. Test the response by striking the cymbal with varying dynamics to ensure consistent performance. Proper cymbal setup enhances your drumming experience, providing realistic sound and feedback. Adjustments can be saved for future sessions, allowing you to maintain optimal cymbal response.

Connecting to a Computer or MIDI Device
Connect the Alesis Nitro Mesh Kit to a computer or MIDI device using a MIDI-to-USB cable or MIDI interface. Configure the module’s MIDI settings for seamless integration and control.
Using MIDI to Expand Functionality
Using MIDI with the Alesis Nitro Mesh Kit unlocks a world of creative possibilities. MIDI allows the kit to communicate with computers, DAWs, and external devices, enabling you to record tracks, trigger virtual instruments, and expand your sound library. By connecting via MIDI, you can access a wide range of sounds beyond the module’s built-in kits, making it ideal for studio production and live performances. MIDI also enables real-time control over external gear, such as synthesizers or drum machines, adding versatility to your setup. This connectivity transforms the Nitro Mesh Kit into a central hub for your musical creations, offering endless opportunities for innovation and expression.
Setting Up Audio Outputs
Setting up the audio outputs on the Alesis Nitro Mesh Kit ensures high-quality sound delivery to your desired destination. Use the HEADPHONE jack for private practice or connect the STEREO OUTPUTS to mixers, sound systems, or audio interfaces. For optimal sound, route the kit’s audio to an external sound card or DAW via MIDI, allowing for professional-grade recording and production. Ensure all cables are securely connected and configured correctly in the module’s settings. This setup provides flexibility for live performances, rehearsals, or studio use, delivering clear and dynamic audio reproduction. Proper configuration of audio outputs is essential for maximizing the kit’s sonic capabilities and achieving a professional sound.

Tips for a Smooth Assembly
Organize all components beforehand, follow the manual step-by-step, and use the provided drum key for secure connections. Tighten bolts gradually and test pads immediately after setup.
Best Practices for Assembly
When assembling the Alesis Nitro Mesh Kit, start by carefully organizing all components and hardware. Refer to the provided Assembly Guide for clear instructions. Use the included drum key to tighten bolts securely but avoid over-tightening, which could damage threads. Begin with the main frame, ensuring stability before attaching pads and cymbals. Connect pads and pedals to the module one at a time, testing each to confirm proper function. Double-check cable connections to the snake and module to prevent signal loss. Finally, calibrate the mesh heads and adjust sensitivity settings for optimal performance. Following these steps ensures a smooth and efficient setup process.
Common Mistakes to Avoid
When assembling the Alesis Nitro Mesh Kit, there are several common mistakes to avoid for a successful setup. Over-tightening bolts can damage threads, so use the drum key gently. Forgetting to calibrate mesh heads after assembly can result in poor sensitivity. Additionally, incorrect cable connections to the snake or module may cause signal loss or unresponsive pads. Another mistake is rushing through the process without testing each component as you go, which can lead to issues later. Lastly, neglecting to follow the provided Assembly Guide step-by-step can result in misaligned parts or unstable frames. By being methodical and attentive, you can avoid these pitfalls and ensure a smooth assembly experience.

Safety Precautions
Always handle electronic components with care to avoid damage. Use the drum key gently to prevent stripping screws. Keep the kit dry and avoid over-tightening bolts.
Handling Electronic Components Safely
When assembling the Alesis Nitro Mesh Kit, handle all electronic components with care to prevent damage. Avoid touching sensitive circuitry or connectors to minimize static discharge. Use the provided drum key gently to tighten or loosen bolts, as excessive force may strip screws. Ensure the module and pads are dry, as moisture can damage electrical components. Never submerge any part in water or expose it to extreme temperatures. When connecting cables, ensure they are securely plugged in to avoid loose connections. Always power off the module before handling internal components. Use an anti-static wrist strap if working with sensitive electronics. Store components in a protective case when not in use to prevent scratches or damage. Handle the drum module by the casing, not the screen or controls, to maintain its integrity.
Preventing Damage to the Kit
To prevent damage to the Alesis Nitro Mesh Kit, ensure all components are handled with care. Avoid exposing the kit to extreme temperatures, moisture, or direct sunlight, as this can harm the mesh heads and electronic module. When assembling, use the provided drum key to tighten bolts evenly, avoiding over-tightening. Store the kit in a protective case or bag when not in use to prevent scratches or accidental impacts. Keep the mesh heads clean and dry, as dirt or liquids may degrade performance. Place the kit on a flat, stable surface during assembly and use a carpet or drum mat to prevent slipping and damage to the legs or frame. Regularly inspect cables and connections for wear or damage to maintain functionality.
Troubleshooting Common Issues
Common issues with the Alesis Nitro Mesh Kit include unresponsive pads, connection problems, or module configuration errors. Check all cable connections, recalibrate mesh heads, and restart the module if issues persist. Always refer to the manual for specific troubleshooting steps.
Resolving Connection Problems
Connection issues with the Alesis Nitro Mesh Kit can often be resolved by checking all cable connections. Ensure the drum pads, cymbals, and pedals are securely connected to the cable snake and that the snake is properly linked to the drum module. If a pad or cymbal is unresponsive, verify that its cable is not damaged or loose. Consult the assembly guide to confirm correct cable routing. If problems persist, recalibrate the mesh heads using the module’s utility menu. Restarting the module can also resolve temporary glitches. Always refer to the user manual for specific troubleshooting steps or contact Alesis support for further assistance.
Fixing Unresponsive Pads or Cymbals
If a drum pad or cymbal on your Alesis Nitro Mesh Kit becomes unresponsive, start by inspecting the connections. Ensure all cables are securely plugged into the correct ports on both the pad/cymbal and the cable snake. If a connection appears loose, gently tighten it. Next, recalibrate the mesh heads using the drum module’s utility settings to restore sensitivity. Power cycling the module by turning it off and on can also resolve temporary issues. If the problem persists, check for physical damage to the pad or cymbal. Refer to the user manual for detailed recalibration steps or contact Alesis support for further assistance if needed.
Addressing Module Configuration Issues
If you encounter issues with the drum module’s configuration on your Alesis Nitro Mesh Kit, start by navigating to the utility settings within the module’s interface. Ensure all MIDI settings are correctly configured to match your setup. Check that the drum pads and cymbals are assigned to the appropriate sounds in the kit. If the module is not responding, verify that all cables are securely connected to the correct ports. Recalibrate the mesh heads if necessary, as sensitivity settings may need adjustment. Additionally, ensure the module’s firmware is up to date, as outdated software can cause configuration problems. If issues persist, consult the user manual or contact Alesis support for further troubleshooting assistance.