
Welcome! This comprehensive guide serves as your instruction manual for the Husqvarna Viking sewing machine, ensuring a delightful and productive sewing journey.
Explore detailed manuals, service information, and resources available online, starting today, April 9th, 2026, to unlock your machine’s full potential.
Understanding Your Machine Model
Identifying Your Specific Model is crucial for accessing the correct resources. Husqvarna Viking offers a diverse range of sewing machines, each with unique features and capabilities; Refer to the model number, typically located on a plate on the machine itself, or within the original packaging.
Accessing Model-Specific Manuals: The Husqvarna Viking website provides downloadable manuals tailored to your exact model. These manuals contain detailed instructions, diagrams, and troubleshooting tips. Resources like the 6690 service manual, and general service manuals are available, but ensure compatibility with your machine.
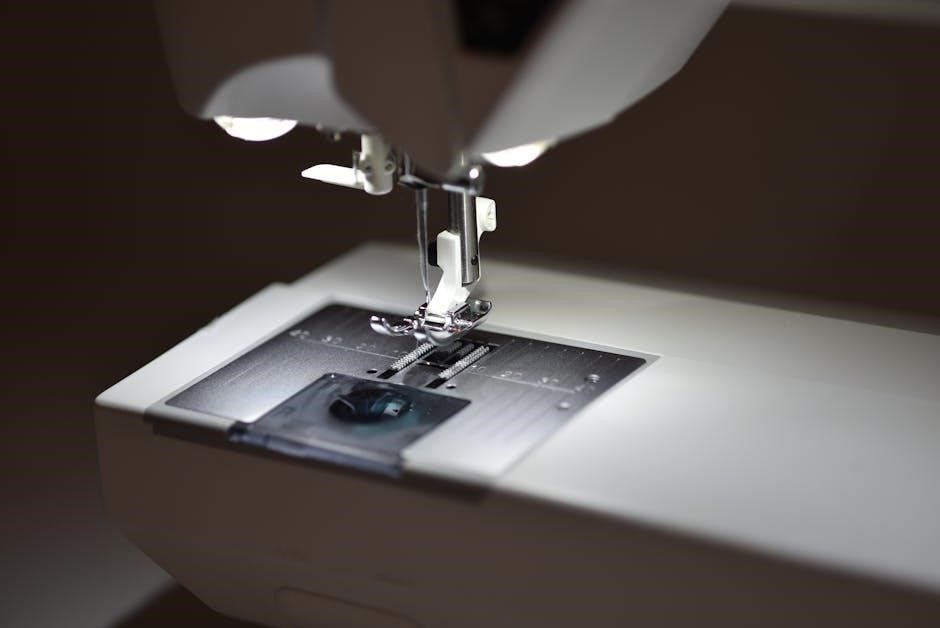
Key Components Overview: Familiarize yourself with the major parts of your machine – the power switch, handwheel, stitch selection dial, presser foot, bobbin winder, and thread tension controls. Understanding these components will streamline your sewing experience and enable efficient operation. Knowing your machine is the first step!
Key Features and Benefits
Innovative Stitching Options: Husqvarna Viking machines boast a wide array of stitches, extending beyond basic straight and zigzag. Explore decorative stitches, stretch stitches, and specialized options for various fabrics and projects. These features enhance creativity and project versatility.
User-Friendly Interface: Many models feature intuitive controls and digital displays, simplifying stitch selection, length/width adjustments, and other settings. This ease of use is beneficial for both beginners and experienced sewers.
Reliable Performance & Durability: Husqvarna Viking machines are known for their robust construction and dependable performance. Access to service manuals, like those available online, ensures longevity through proper maintenance. The availability of parts and repair information further supports long-term usability, making it a worthwhile investment.
Setting Up Your Sewing Machine
Prepare for success! This section details the initial setup, including bobbin winding and precise threading of both upper and bobbin threads for optimal performance.
Initial Machine Setup
Unboxing and Placement: Carefully unpack your new Husqvarna Viking sewing machine and ensure all included accessories are present. Place the machine on a stable, level surface with adequate lighting. Consider a dedicated sewing table for comfort and efficiency.
Power Connection: Connect the power cord to a grounded outlet. Verify the voltage setting on the machine matches your local power supply. Never operate the machine if the power cord is damaged.
Foot Pedal Connection: Plug the foot pedal into the designated port on the machine. The foot pedal controls the sewing speed, allowing for precise control during operation.
Initial Inspection: Briefly inspect all moving parts to ensure they are free from shipping debris. Refer to the diagrams in your manual for component identification. Familiarize yourself with the location of key controls, such as the power switch, stitch selection dial, and reverse lever.
Winding the Bobbin
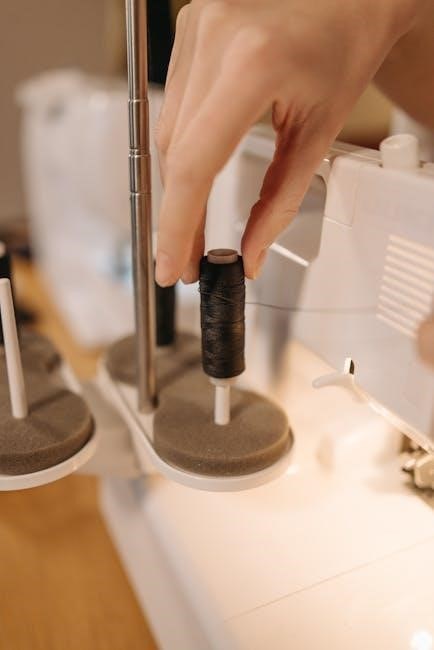
Bobbin Preparation: Begin by placing an empty bobbin onto the bobbin winder spindle. Ensure it clicks securely into place. Next, guide the thread from the spool, through the thread guide, and then onto the bobbin, following the path illustrated in your machine’s manual.
Winding Process: Gently push the bobbin winder to the right and engage the winding mechanism. Press the foot pedal lightly to start the winding process. The machine will automatically stop when the bobbin is full.
Thread Tension: Monitor the thread tension during winding. If the thread is winding unevenly, adjust the bobbin winding tension dial accordingly. Consistent tension ensures a smooth and even bobbin fill.
Completion: Once the bobbin is full, disengage the winder and remove the bobbin. Trim the thread end neatly. A properly wound bobbin is crucial for consistent stitch quality.
Threading the Upper Thread
Initial Steps: Begin with the presser foot lifted and the needle in its highest position. Place your spool of thread onto the spool pin. Guide the thread through the first thread guide, ensuring it’s securely seated.
Tension and Take-Up: Continue threading through the tension discs – this is vital for stitch quality. Next, lead the thread through the take-up lever, ensuring it’s properly engaged. This action controls the stitch formation.
Needle Threading: Guide the thread down through the needle clamp and finally, thread the needle from front to back. A needle threader can be helpful if needed.
Final Check: Gently pull the thread to confirm it’s correctly threaded through all guides and the needle. Proper threading is essential for smooth and reliable sewing performance.
Threading the Bobbin Thread
Bobbin Insertion: After winding the bobbin, insert it into the bobbin case, ensuring it clicks into place. The direction of insertion varies by model, so consult your machine’s specific diagram.
Thread Path: Draw the bobbin thread up through the bobbin case tension spring. You may need to gently wiggle the thread to ensure it’s properly engaged.
Guide to Needle Plate: Continue guiding the bobbin thread through the designated slot or tunnel in the needle plate. This path leads the thread to the needle’s eye.
Initial Pull-Up: Hold the upper thread loosely and turn the handwheel towards you, lowering and raising the needle. This should loop the upper thread and catch the bobbin thread, pulling it up through the needle plate. Gently pull both threads to the back of the machine.
Basic Sewing Techniques
Master the Fundamentals! Begin with straight and zigzag stitches, adjusting length and width for varied projects, unlocking your Husqvarna Viking’s potential today.
Straight Stitching
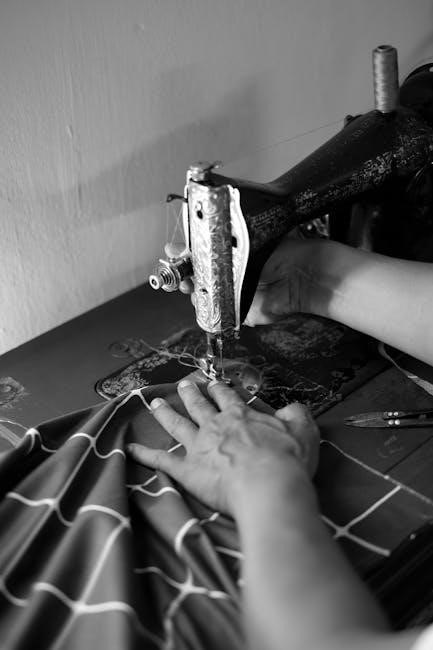
The Foundation of Sewing: Straight stitching is the most fundamental technique, essential for constructing garments, quilting, and various sewing projects with your Husqvarna Viking machine.
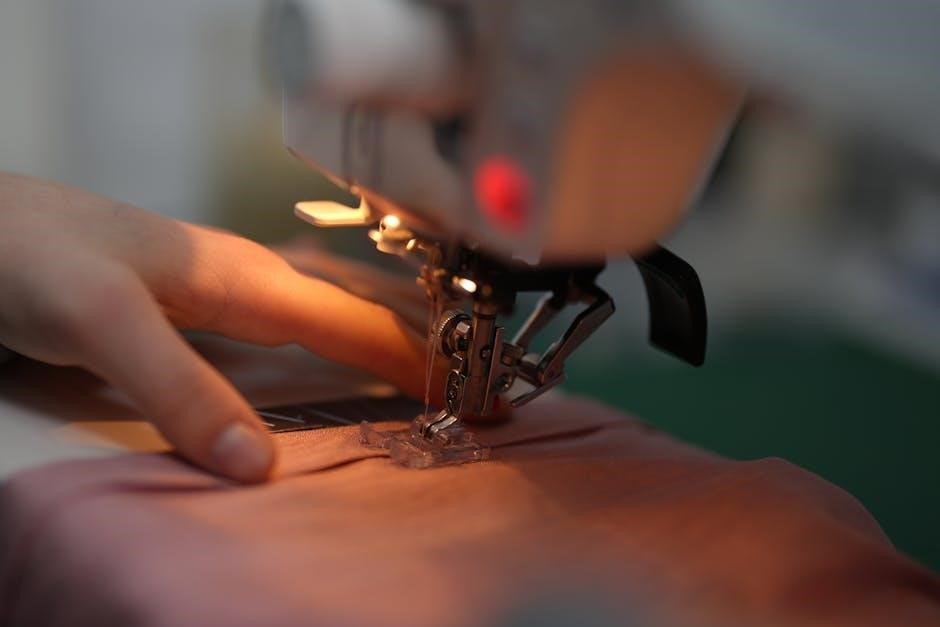
To begin, select the straight stitch setting on your machine – typically indicated by a straight line symbol. Ensure your fabric is positioned correctly under the presser foot, aligning the edge with the desired seam allowance guide on the needle plate.
Gently lower the presser foot to secure the fabric. Begin sewing slowly, guiding the fabric straight while maintaining a consistent speed. Avoid pulling or pushing the fabric; let the machine feed it through naturally.
For accurate seam allowances, utilize the markings on the needle plate as a guide; Backstitch at the beginning and end of each seam to secure the stitches and prevent unraveling. Practice on scrap fabric to achieve consistent, even stitches before working on your final project. Remember to adjust stitch length based on fabric type and desired strength.
Zigzag Stitching
Versatility in Every Stitch: Zigzag stitching offers incredible versatility, perfect for finishing raw edges, creating decorative accents, and sewing stretch fabrics with your Husqvarna Viking machine.
Select the zigzag stitch setting, identifiable by its zigzag pattern symbol. Adjust the stitch width and length according to your project needs – wider stitches are ideal for edge finishing, while shorter stitches provide greater stability.
Position your fabric under the presser foot and lower it securely. Begin sewing slowly, guiding the fabric to maintain a consistent zigzag pattern. For edge finishing, align the fabric edge with the outer swing of the zigzag stitch.
Experiment with different stitch widths and lengths to achieve various effects. Zigzag stitching is particularly useful when working with knits, allowing the seam to stretch with the fabric. Remember to test on scrap fabric to determine the optimal settings for your material. Backstitch at the beginning and end for secure seams.
Adjusting Stitch Length and Width
Precision Control for Perfect Results: Mastering stitch length and width adjustments is crucial for achieving professional-looking results with your Husqvarna Viking sewing machine. These settings directly impact the strength, appearance, and suitability of your stitches for different fabrics.
Locate the stitch length dial or buttons – typically marked with numbers indicating stitch length in millimeters. Shorter stitch lengths (e.g., 1.5mm) are ideal for delicate fabrics and intricate details, while longer lengths (e.g., 3.0mm) are suitable for heavier materials and quicker sewing.
The stitch width control adjusts the side-to-side distance of the stitch. For straight stitching, set the width to zero. Increasing the width creates wider zigzag or decorative stitches. Always test your settings on a scrap piece of fabric before starting your project.
Refer to your machine’s manual for specific recommendations based on fabric type and desired stitch effect. Consistent testing ensures optimal stitch formation and prevents puckering or fabric damage.
Advanced Sewing Techniques
Expand Your Skills! Discover the power of specialized presser feet, intricate decorative stitches, and the creative freedom of free motion quilting with your machine.
Using Different Presser Feet
Unlock Versatility! Your Husqvarna Viking sewing machine’s capabilities are dramatically expanded by utilizing a variety of presser feet. The standard presser foot is ideal for everyday sewing, but specialized feet open a world of possibilities.
Consider the zipper foot for precise zipper application, ensuring consistent stitch placement close to the teeth. The buttonhole foot automates perfect buttonholes, saving time and effort. A blind hem foot creates nearly invisible hems, offering a professional finish;
Furthermore, explore the satin stitch foot for beautiful decorative stitching and the open toe appliqué foot for enhanced visibility during appliqué work. Refer to your machine’s manual for a complete list of compatible feet and detailed instructions on attachment and usage. Experimenting with different feet will elevate your sewing projects to new levels of quality and creativity!
Decorative Stitching
Embellish Your Creations! Husqvarna Viking sewing machines excel in decorative stitching, offering a vast library of designs to personalize your projects. Access these stitches through your machine’s stitch selection menu, often displayed on a screen or chart.
Experiment with floral motifs, geometric patterns, and whimsical designs to add unique flair to garments, home décor, and quilting. Adjust stitch width and length to modify the appearance of the design, creating subtle or bold effects.
Stabilizers are often recommended when using decorative stitches, particularly on delicate fabrics, to prevent puckering or distortion. Consult your machine’s manual for guidance on appropriate stabilizer types and techniques. Don’t hesitate to test stitches on scrap fabric before applying them to your final project – unleash your creativity!
Free Motion Quilting
Unleash Your Artistic Side! Free motion quilting allows you to create intricate designs without the feed dogs engaging, giving you complete control over stitch placement. Begin by attaching the free motion quilting foot to your Husqvarna Viking machine.
Lower the feed dogs – a lever or setting on your machine controls this. Gently move the fabric under the needle, guiding it with your hands to create desired patterns. Practice consistent speed and pressure for smooth, even stitches.
Using a quilting glove can enhance grip and control. Experiment with different thread weights and colors to achieve varied effects. Remember to consult your machine’s manual for specific instructions and recommended settings for optimal free motion quilting performance.

Maintenance and Troubleshooting
Keep Sewing Smoothly! Regular cleaning, proper oiling, and understanding common issues—detailed in your manual—will ensure your Husqvarna Viking machine’s longevity and performance.
Cleaning Your Sewing Machine
Maintaining a clean machine is crucial for optimal performance and longevity. Dust, lint, and stray threads can accumulate within the machine, hindering its operation and potentially causing damage. Always disconnect the power cord before beginning any cleaning procedure.
Use a soft brush – often included with your machine – to gently remove lint from the bobbin area, feed dogs, and around the needle plate. A small vacuum cleaner with a brush attachment can also be helpful for reaching tight spaces. Never use compressed air, as it can blow dust further into the machine.
Wipe down the exterior surfaces with a slightly damp cloth. Avoid harsh chemicals or abrasive cleaners, as these can damage the finish. Pay particular attention to areas where oil may accumulate. Refer to your Husqvarna Viking service manual for specific cleaning recommendations related to your model, ensuring you follow the manufacturer’s guidelines for safe and effective maintenance.
Oil and Lubrication
Proper lubrication is essential for smooth operation and preventing wear and tear on your Husqvarna Viking sewing machine. However, over-oiling can be just as detrimental as under-oiling, attracting lint and causing build-up. Consult your machine’s service manual to identify specific oiling points.
Use only sewing machine oil specifically designed for this purpose; other oils may damage internal components. Apply a small drop of oil to the designated areas, such as the bobbin race, hook assembly, and any points indicated in the manual. Avoid oiling the feed dogs or tension discs unless specifically instructed.
After oiling, run the machine briefly to distribute the oil evenly. Wipe away any excess oil with a clean, lint-free cloth. Regular oiling, as recommended in your Husqvarna Viking manual, will contribute significantly to the machine’s lifespan and consistent performance.
Common Problems and Solutions
Thread bunching often indicates incorrect threading or improper tension. Re-thread both the upper and bobbin threads, ensuring they are correctly seated in the tension discs. Skipped stitches can result from a dull or incorrect needle; replace it with a new needle of the appropriate type and size for your fabric.
If your machine is making excessive noise, check for lint build-up in the bobbin area and clean thoroughly. A jammed bobbin can usually be resolved by carefully removing the bobbin case and clearing any tangled threads. Always refer to your Husqvarna Viking service manual for detailed troubleshooting steps.
Remember to unplug the machine before attempting any repairs. If problems persist, consult a qualified sewing machine technician for assistance.
Resources and Support
Explore the official Husqvarna Viking website for downloadable manuals, helpful FAQs, and service manual access. Find repair information and connect with support communities online!
Husqvarna Viking Website and Downloads
Accessing a wealth of information is simple through the official Husqvarna Viking website. Here, you’ll discover a dedicated section for manuals, specifically tailored to your sewing machine model – including the 330 series.
Download user manuals, quick start guides, and supplementary materials directly to your computer or mobile device for convenient offline access. The website also provides software updates for compatible machines, enhancing functionality and performance.
Furthermore, explore a library of instructional videos demonstrating various techniques and features. These resources cover everything from basic threading to advanced decorative stitching. Registration on the website unlocks access to exclusive content and personalized support options. You can also find frequently asked questions (FAQs) addressing common issues and troubleshooting tips. Don’t hesitate to utilize these digital resources to maximize your sewing experience!
Service Manuals and Repair Information
For more in-depth technical details, consider accessing Husqvarna Viking service manuals. These comprehensive guides, like the one available for the 6690 model, provide detailed diagrams and step-by-step instructions for machine maintenance and repair.
While intended for qualified technicians, service manuals can be valuable for experienced users seeking to understand the inner workings of their machine. Be aware that attempting complex repairs without proper training could void your warranty.
Resources are available online, with some manuals dating back to 2020, offering a historical perspective on machine evolution. Remember to verify compatibility with your specific model before utilizing any repair information. If you encounter issues beyond your expertise, it’s always best to consult a certified Husqvarna Viking service center for professional assistance and genuine parts.