The Cobra Knot‚ also known as the Solomon Bar or Portuguese Sinnet‚ is a popular and durable knotting technique․ Widely used in survival bracelets and lanyards‚ it offers a sleek‚ functional design․
1․1 What is the Cobra Knot?
The Cobra Knot‚ also known as the Solomon Bar or Portuguese Sinnet‚ is a versatile and durable knotting technique․ It involves interweaving two or more strands of material‚ such as paracord‚ to create a sleek‚ textured pattern․ This knot is highly popular in survival gear‚ crafting‚ and decorative projects due to its strength and aesthetic appeal․ The Cobra Knot is often used in bracelets‚ lanyards‚ and keychains‚ where it provides both functionality and style․ Its tight weave ensures minimal fray and maximum durability‚ making it ideal for practical applications․ Whether for survival tools or fashion accessories‚ the Cobra Knot is a go-to choice for its reliability and visual appeal․ It is widely regarded as one of the most essential knots for both beginners and experienced crafters․
1․2 History and Origins of the Cobra Knot
The Cobra Knot‚ also referred to as the Solomon Bar or Portuguese Sinnet‚ has a rich history rooted in maritime and military traditions․ Originating as a practical solution for securing ropes and lines‚ it gained prominence for its durability and aesthetic appeal․ Historically‚ sailors and soldiers used this knotting technique to create functional and decorative items like lanyards and belts․ Over time‚ its popularity grew in survival and crafting communities‚ where it became a staple for paracord projects․ The Cobra Knot’s versatility and strength made it a favorite for both utility and artistry‚ leading to its widespread use in modern applications such as survival bracelets‚ keychains‚ and decorative accessories․
1․3 Popular Uses of the Cobra Knot
The Cobra Knot is renowned for its versatility‚ making it a favorite in various practical and creative projects․ It is most famously used in crafting paracord survival bracelets‚ where it not only adds aesthetic value but also ensures functionality․ Additionally‚ the knot is frequently employed in lanyards‚ keychains‚ and bag straps due to its strength and durability․ Many enthusiasts also utilize the Cobra Knot in decorative macrame designs‚ jewelry‚ and other DIY crafts․ Its popularity extends to military and outdoor applications‚ where reliability and style are essential․ Whether for survival gear or fashionable accessories‚ the Cobra Knot remains a top choice for its unique combination of form and function․
Materials Needed for the Cobra Knot
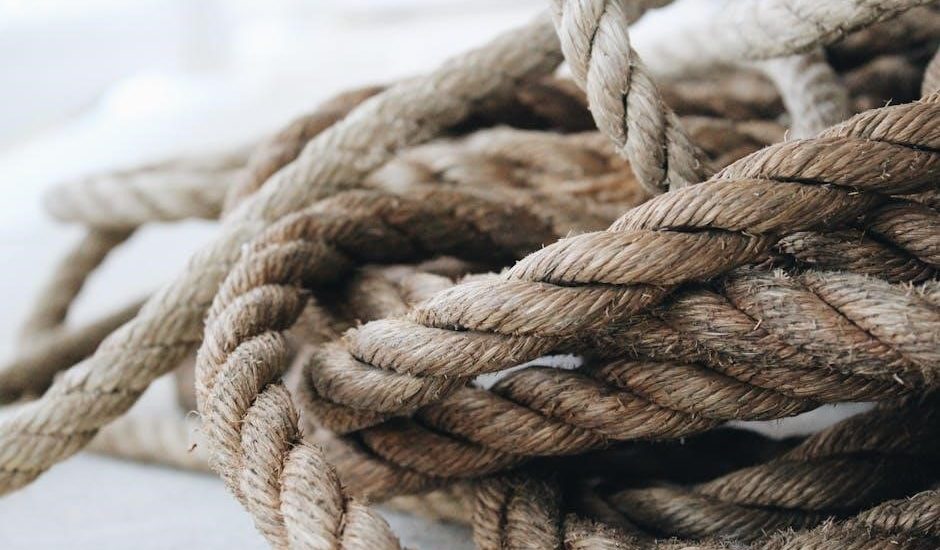
To create a Cobra Knot‚ you’ll need high-quality paracord (preferably 550 type)‚ a sturdy buckle or closure‚ and basic tools like scissors and a lighter for finishing touches․
2․1 Paracord (Type and Length Requirements)
For a Cobra Knot project‚ use Type III (550) paracord‚ known for its durability and strength․ The length depends on the project size; a good rule is 1 foot of paracord per inch of the finished item․ For example‚ an 8-inch bracelet requires about 8 feet of paracord․ This ensures enough material for weaving without excess․ Using high-quality paracord guarantees a professional finish and longevity of the knot․ Always measure accurately to avoid running short during the process․ Proper paracord selection is crucial for both functionality and aesthetics in your Cobra Knot creation․
2․2 Buckle or Closure
A sturdy buckle or closure is essential for securing your Cobra Knot project․ Common options include plastic or metal buckles‚ which provide durability and ease of use․ Choose a buckle that complements your project’s size and style․ For survival bracelets‚ a side-release buckle is ideal for quick removal․ Ensure the buckle is securely attached to the paracord ends to prevent loosening over time․ Properly fitted closures enhance both functionality and safety‚ making your Cobra Knot creation reliable for various applications․ Selecting the right buckle ensures a professional finish and long-lasting performance․
2․3 Scissors and Lighter
Sharp scissors or a utility knife are necessary for cutting paracord accurately‚ ensuring clean ends for a professional finish․ A lighter is used to melt the cut ends‚ preventing fraying and reinforcing the paracord’s integrity․ This step is crucial for maintaining the durability of your Cobra Knot project․ Always handle sharp objects with care‚ and be cautious when using the lighter to avoid burns․ Properly melting the paracord ends ensures a neat and secure finish‚ enhancing both the functionality and appearance of your final product․ These tools are essential for completing the Cobra Knot effectively and safely․
Step-by-Step Instructions for Tying the Cobra Knot
Learn to tie the Cobra Knot with easy step-by-step instructions․ Start by securing the paracord and begin the weave․ Cross strands under and over‚ then tighten to form the Cobra pattern․ Continue this process until the desired length is achieved․ Secure the ends neatly․ For detailed visuals‚ refer to the PDF guide․
3․1 Starting the Cobra Knot
Begin by securing the paracord to a stable object or a buckle․ Fold the paracord into a loop and attach it using a Lark’s Head Knot․ This forms the foundation of the Cobra Knot; Ensure the paracord is properly aligned and not twisted․ Hold the strands firmly to maintain tension‚ which is crucial for a neat and secure weave․ This step sets the stage for the Cobra Weave technique․ For clarity‚ refer to the PDF guide for visual instructions․ Properly starting the knot ensures a professional finish․ Keep the strands parallel and avoid overlapping to maintain the pattern’s integrity․ Begin weaving by crossing one strand over the other‚ following the step-by-step process outlined in the guide․ This initial step is essential for achieving the desired result․
3․2 The Cobra Weave Technique
Begin the Cobra Weave by crossing strand B over strands C and D‚ then under strand A․ Next‚ cross strand A under strands C and D and over strand B․ Pull the strands tightly to secure the weave․ Repeat this process‚ alternating strands B and A over and under the others․ Continue this pattern‚ ensuring each pass tightens the weave․ The Cobra Knot forms as the strands interlock․ Maintain consistent tension to keep the knot neat and symmetrical․ Refer to the PDF guide for visual clarity․ This technique creates the signature Cobra Knot design‚ essential for survival bracelets and lanyards․ Follow the step-by-step instructions carefully to achieve a professional finish․
3․3 Finishing Touches
Once the Cobra Weave is complete‚ trim the excess paracord close to the knot․ Use a lighter to carefully burn the cut ends‚ preventing fraying․ For a polished look‚ ensure the burn is even and not charred․ If using beads‚ thread them onto the core wires before securing․ Adjust the bracelet to fit your wrist snugly․ Tuck any loose ends under the weave for a clean finish․ Double-check all steps to ensure the knot is tight and even․ Refer to the PDF guide for precise visuals․ Properly sealing the ends guarantees durability‚ making the Cobra Knot both functional and visually appealing for bracelets‚ lanyards‚ or keychains․
Applications of the Cobra Knot
The Cobra Knot is versatile‚ used in survival bracelets‚ lanyards‚ keychains‚ and decorative projects․ Its durability and style make it ideal for both functional and aesthetic purposes․
4․1 Paracord Survival Bracelets
Paracord survival bracelets are a popular application of the Cobra Knot․ These bracelets are woven using durable paracord‚ storing several feet of cord that can be unraveled in emergencies․ They are lightweight and compact‚ making them ideal for outdoor enthusiasts‚ hikers‚ and military personnel․ The Cobra Knot’s design ensures that the bracelet is both functional and stylish‚ with the ability to quickly deploy the paracord when needed․ Many survival bracelets also incorporate beads or other elements for added functionality‚ such as a compass or whistle․ The Cobra Knot’s strength and reliability make it a cornerstone of these essential survival tools․
4․2 Lanyards and Keychains
Lanyards and keychains are among the most common applications of the Cobra Knot․ Its durability and aesthetic appeal make it ideal for securing items like keys‚ tools‚ or identification tags․ The Cobra Knot’s weave creates a sturdy yet stylish loop‚ perfect for attaching to belts‚ bags‚ or other gear․ Many enthusiasts use paracord lanyards for their versatility and the ability to customize colors and patterns․ Additionally‚ the knot’s strength ensures that items remain securely fastened‚ even with heavy use․ Whether for practical purposes or as a fashionable accessory‚ the Cobra Knot enhances both functionality and style in lanyards and keychains‚ making it a favorite among crafters and outdoor enthusiasts alike․
4․3 Decorative and Functional Projects
The Cobra Knot is highly versatile‚ making it ideal for both decorative and functional projects․ It is commonly used in crafting decorative items like bracelets‚ keychains‚ and bag accessories‚ where its intricate weave adds visual appeal․ Beyond aesthetics‚ the knot’s strength and durability make it perfect for functional applications‚ such as securing gear‚ creating dog leashes‚ or reinforcing bag straps․ Crafters often incorporate beads or custom colors to personalize their projects‚ blending style with practicality․ Whether for fashion or utility‚ the Cobra Knot’s adaptability ensures it remains a favorite among DIY enthusiasts‚ offering endless possibilities for creative and practical uses․ Its seamless blend of form and function makes it a cornerstone in paracord crafting․
Tips for Making the Cobra Knot
Ensure even tension while weaving to maintain a neat appearance; Use a buckle for secure fastening and trim excess cord neatly․ Practice on scrap paracord first․
5․1 Maintaining Tension
Maintaining even tension is crucial for a neat and secure Cobra Knot․ Start by gently pulling each strand to tighten the weave without over-tightening․ Use a tool like a paracord needle or a flat object to help adjust tension if needed․ Ensure the strands lie flat and parallel‚ avoiding twists or overlaps․ As you weave‚ periodically check the bracelet’s flexibility and adjust the tension to achieve a balanced look․ Proper tension ensures the knot holds firmly and the bracelet remains comfortable to wear․ Over-tightening can make the bracelet rigid‚ while under-tightening may cause it to loosen over time․ Practice adjusting tension evenly to master the Cobra Knot’s professional finish․
5․2 Avoiding Common Mistakes
When tying the Cobra Knot‚ common mistakes include twisting the strands‚ uneven tension‚ and incorrect looping․ To avoid these‚ keep the strands straight and parallel as you weave․ Ensure each loop is consistent in size and alignment․ Periodically check the tension by gently pulling the strands—too tight can cause puckering‚ while too loose may result in a sloppy finish․ Another mistake is miscounting the number of loops‚ which can throw off the bracelet’s symmetry․ To fix this‚ count the loops as you go and adjust before tightening․ Finally‚ avoid cutting the paracord too short‚ as this can make it difficult to finish the knot properly․ By paying attention to these details‚ you can achieve a professional-looking Cobra Knot․
5․3 Customizing Your Knot
Customizing your Cobra Knot allows you to personalize your project while maintaining its functionality․ One popular way to customize is by using different colored paracord strands to create unique patterns or match your preferred style․ Adding beads or small decorative elements can also enhance the visual appeal of the knot․ Experimenting with varying lengths or adjusting the tightness of the weave can create different textures․ For a more intricate look‚ you can incorporate additional knots or wraps within the Cobra Knot design․ Some crafters even use alternative materials‚ such as leather or wire‚ for a distinct aesthetic․ By exploring these options‚ you can tailor your Cobra Knot to suit your creative vision or specific functional needs․
A downloadable PDF guide provides detailed‚ step-by-step instructions for tying the Cobra Knot․ It includes visuals and tips‚ making it a valuable resource for beginners and experts alike․
6․1 Downloading the PDF Guide
Downloading the Cobra Knot PDF guide is straightforward․ Visit trusted websites offering free guides‚ such as paracord tutorial sites‚ and click the download link․ Ensure the file is in PDF format for compatibility with most devices․ Some guides may require sign-up‚ while others are instantly accessible․ Once downloaded‚ save it to your device for offline access․ This guide typically includes clear diagrams‚ step-by-step instructions‚ and tips for mastering the Cobra Weave․ It’s a handy resource for both beginners and experienced crafters‚ providing a comprehensive learning experience․ Always verify the source to ensure quality and accuracy․
6․2 Printing and Using the Instructions
Once downloaded‚ print the Cobra Knot PDF guide on high-quality paper for clarity․ Use a binder or folder to keep the instructions organized and easily accessible․ Review the guide thoroughly before starting your project․ The diagrams and step-by-step instructions will help you master the Cobra Weave․ For best results‚ print in color to see the knot details clearly․ If using digitally‚ zoom in on complex steps for better visibility․ Ensure the print is legible and large enough to follow without strain․ This guide is perfect for both beginners and experienced crafters‚ providing a clear roadmap to creating durable paracord projects․
Safety Precautions
Handle sharp objects like scissors and lighters with care to avoid cuts and burns․ Use caution when melting paracord ends to prevent accidental fires or injuries․
7;1 Handling Sharp Objects
When working with sharp objects like scissors‚ knives‚ or lighters‚ always prioritize safety․ Wear protective gloves to prevent cuts and ensure a firm grip․ Cut paracord away from your body to avoid accidents․ Keep your work area clear of clutter to maintain control․ Use scissors with blunt tips for safer handling‚ especially for beginners․ Lighters should be handled with care‚ avoiding prolonged exposure to flames․ Store sharp tools out of children’s reach․ Regularly inspect tools for dullness‚ as dull blades can slip and cause injuries․ Always cut on a stable surface‚ ensuring the paracord is secure․ Proper handling prevents accidents‚ ensuring a safe crafting experience․ Stay focused and avoid distractions while using sharp objects․ Maintain a well-lit workspace to see your actions clearly․ By following these precautions‚ you can minimize risks and enjoy a safe knot-tying process․
7․2 Burning and Melting Paracord
Burning and melting paracord ends is essential to prevent fraying and ensure a professional finish․ Use a lighter or torch to carefully melt the cut ends of the paracord․ Hold the flame 2-3 inches away‚ applying gentle heat until the material melts and forms a smooth‚ rounded tip․ Avoid prolonged exposure‚ as excessive heat can damage the paracord’s integrity․ Once melted‚ allow the ends to cool before handling․ This step not only enhances durability but also improves the overall appearance of your Cobra Knot project․ Always work in a well-ventilated area and keep flammable materials away․ Properly melting paracord ends is a critical step for safety and aesthetics in your crafting process․
The Cobra Knot is a popular‚ durable technique with versatile applications‚ from survival gear to decorative items‚ making it a must-learn for any crafting enthusiast․
8․1 Final Thoughts
8․2 Encouragement to Practice
Mastering the Cobra Knot takes time and patience‚ but the rewards are well worth the effort․ Don’t be discouraged by initial mistakes—each attempt brings you closer to perfection․ Start with simple projects‚ like a basic bracelet‚ and gradually move on to more complex designs․ The satisfaction of creating something with your own hands is unparalleled․ As you practice‚ you’ll develop muscle memory and confidence․ Remember‚ even experienced crafters began with their first knot․ Embrace the process‚ enjoy the journey‚ and take pride in your creations․ With persistence‚ you’ll unlock the full potential of the Cobra Knot and create beautiful‚ functional pieces that inspire admiration and serve practical purposes․
Additional Resources
Explore online tutorials‚ video guides‚ and community forums for detailed Cobra Knot instructions․ Downloadable PDFs and step-by-step blogs offer comprehensive learning tools for mastering this versatile knot․
9․1 Online Tutorials
Online tutorials provide step-by-step guides and visual aids for mastering the Cobra Knot․ Websites like YouTube and specialized crafting forums offer detailed videos and written instructions․ Many tutorials include photos and diagrams to help learners understand each step clearly․ Some platforms even provide slow-motion videos to ensure that users can follow along without missing any details․ Additionally‚ interactive tools and forums allow users to ask questions and share their projects․ These resources are particularly helpful for beginners who prefer visual learning․ With so many options available‚ learners can choose the tutorial that best fits their learning style and skill level․ This makes learning the Cobra Knot more accessible than ever․
9․2 Video Guides
Video guides are an excellent resource for learning the Cobra Knot‚ offering a visual and interactive approach․ Platforms like YouTube and crafting websites provide detailed tutorials that demonstrate each step in real-time․ Many videos include close-ups‚ slow-motion replays‚ and clear audio instructions‚ making it easier to follow along․ Some guides also feature multiple camera angles to show the knot from different perspectives․ Additionally‚ video guides often include tips for common mistakes and variations of the knot․ They are particularly useful for visual learners who benefit from seeing the process in action․ With video guides‚ users can pause‚ rewind‚ and practice alongside the instructor‚ ensuring they master the Cobra Knot efficiently․
9․3 Community Forums
Community forums are a valuable resource for those looking to master the Cobra Knot․ These platforms allow users to share experiences‚ ask questions‚ and learn from others who have successfully created paracord projects․ Many forums dedicated to knot-tying‚ survival gear‚ and DIY crafts feature detailed discussions about the Cobra Knot․ Members often share tips‚ troubleshoot common issues‚ and showcase their finished projects․ Additionally‚ some forums offer downloadable resources‚ including PDF guides and step-by-step tutorials․ Engaging with these communities can provide personalized advice and inspiration‚ helping users refine their skills and explore new applications for the Cobra Knot․ They also foster a sense of camaraderie among enthusiasts‚ making the learning process more enjoyable and collaborative․